painter油画图文详细教程 painter油画效果图片怎么做
时间:2024/10/9作者:未知来源:盾怪网教程人气:
- [摘要]painter油画教程:用Painter8把照片加工成厚涂油画的感觉很有趣,这里我们再次使用了图像处理中非常有用的技术——克隆。Painter提供了现成的厚涂...
painter油画教程:
用Painter8把照片加工成厚涂油画的感觉很有趣,这里我们再次使用了图像处理中非常有用的技术——克隆。
Painter提供了现成的厚涂克隆画笔,我们需要做的只是涂抹,不必担心颜色是否准确,只要注意笔触的排列就行了。
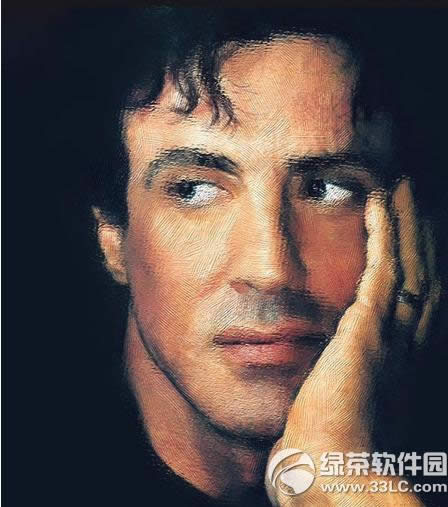
素材如下:

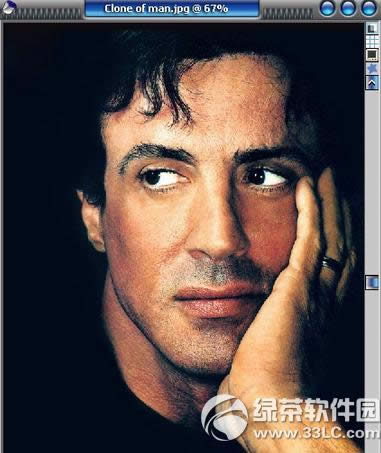
最后完成图:
绘画步骤:
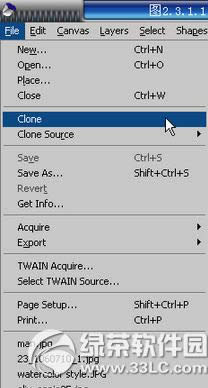
1.在Painter 8中打开一张你选好的图片。执行【File】/【Clone】(文件/克隆)的菜单命令。(图2.3.1.1和图2.3.1.2所示)
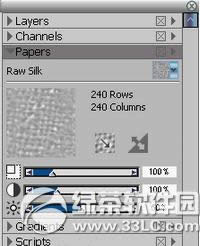
2.到【Paper】(纸纹面板),选择【Raw Silk】的纸纹(本教程末尾提供纸纹文件下载,用Paper Mover载入使用即可)。(图2.3.2所示)
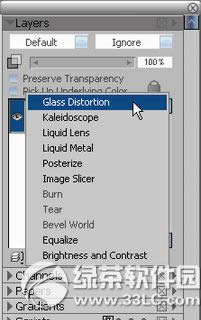
3.到【Layers】(图层面板),添加一个【Glass Distortion】(玻璃扭曲动态图层)。(图2.3.3所示)
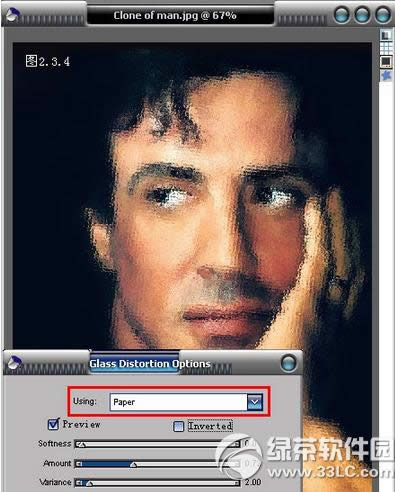
4.在【Glass Distortion Options】的对话框中选择【Using】为【Paper】,调节【Amount】数值为0.72左右,最后按下OK按钮确定。(图2.3.4所示)
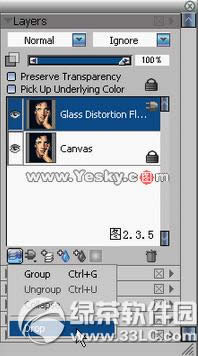
5.选择【Drop】的命令合并图层。(图2.3.5所示)
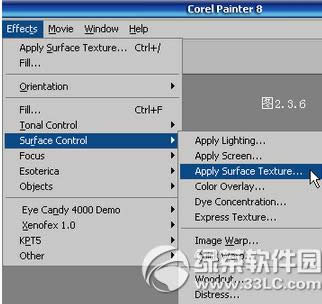
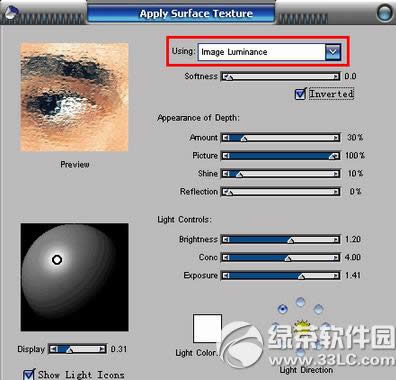
6.执行【Effects】/【Surface Control】/【Apply Surface Texture】(效果/表面控制/运用表面纹理)的菜单命令。(图2.3.6所示)
7.在【Apply Surface Texture】的对话框中设定【Using】为【Image Luminance】,设定【Shine】的百分比为10%,设定【Amount】的数值为30%左右。(图2.3.7所示)
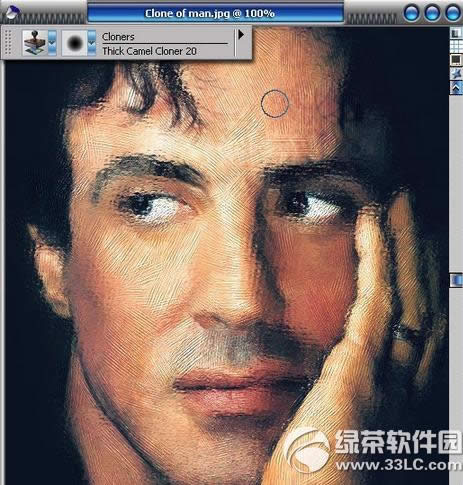
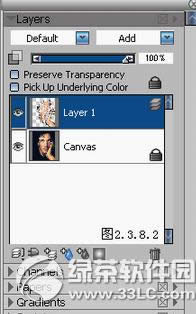
8.新建一个图层,使用【Cloners】/【Thick Camel Cloner 20】(克隆/厚涂驼毛笔克隆20号)在新图层上进行克隆绘画。(图2.3.8.1和图2.3.8.2所示)
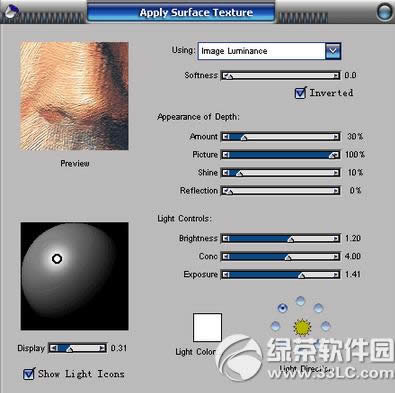
9.合并图层,再次执行【Apply Surface Texture】的菜单命令,增加笔触的厚度。(图2.3.9所示)
虽然整个“绘画”过程并不光彩,但是作为一个成功的图像处理技巧,最后的结果还是不错的
以上就是绿茶小编为大家介绍的painter油画教程,希望能够帮助到大家,如果想要了解更多资讯请继续关注绿茶软件园。
3dsmax怎么做玻璃杯 3dsmax玻璃杯制作图文教程
用3dsmax怎么做扇子 3dsmax扇子制作教程学习教程快速掌握从入门到精通的电脑知识
关键词:painter油画图文详细教程 painter油画效果图片怎样做